LEOMINOR CARE · DENTALBAY

After-sales service & repairs.Here when you need us.

A visual after-sales guide for your Leominor device. Find the symptom, follow the checks beside its picture and see when service is needed. Enlarge any guide to read the details.

  • 3-year warranty, subject to terms
  • Model-specific guidance
  • Support and spare parts
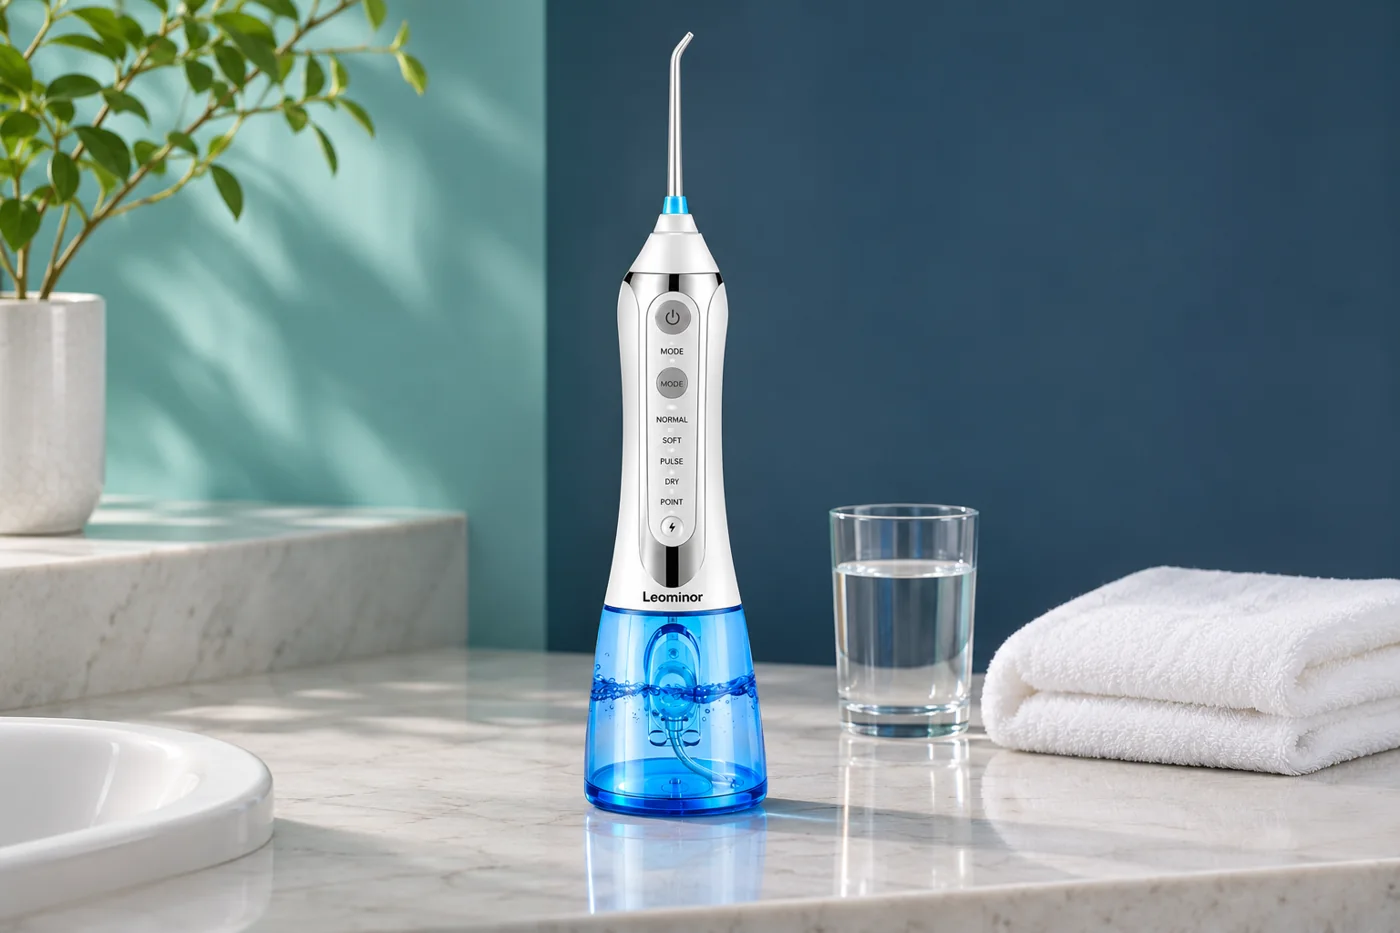
White Leominor water flosser with a blue tank beside a towel and glass of water on a clean counter
Leominor Careby DentalBay & MedBay

START HERE

What is happening with your device?

Every issue has a visual guide and readable steps. Original artwork is in Arabic; the accompanying instructions are in English. Check the model shown before following model-specific guidance.

01

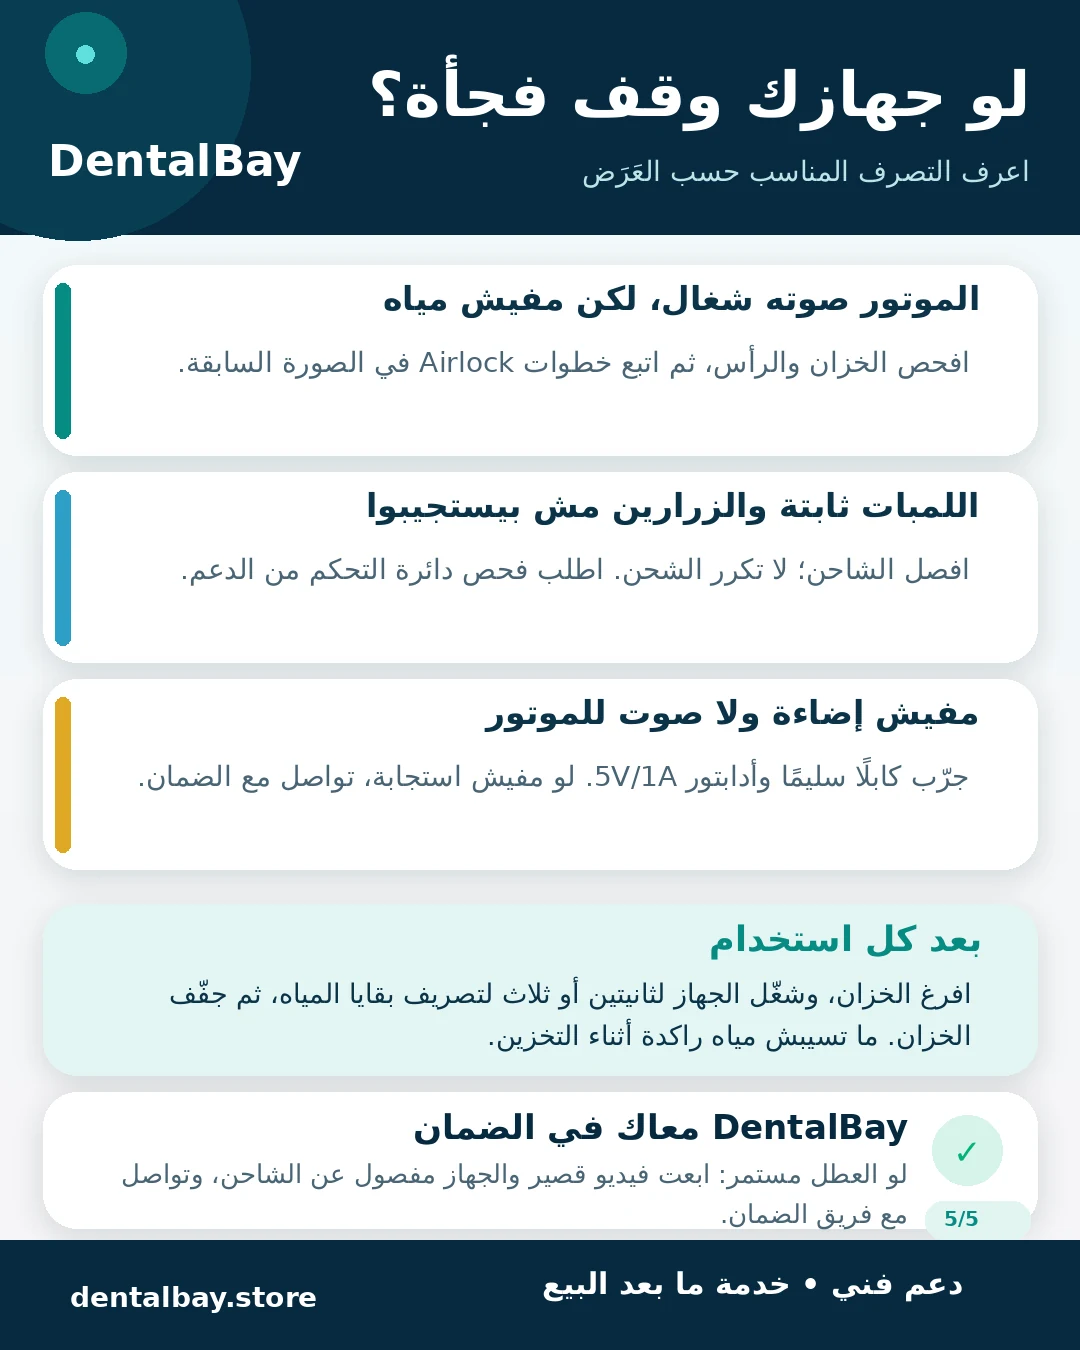
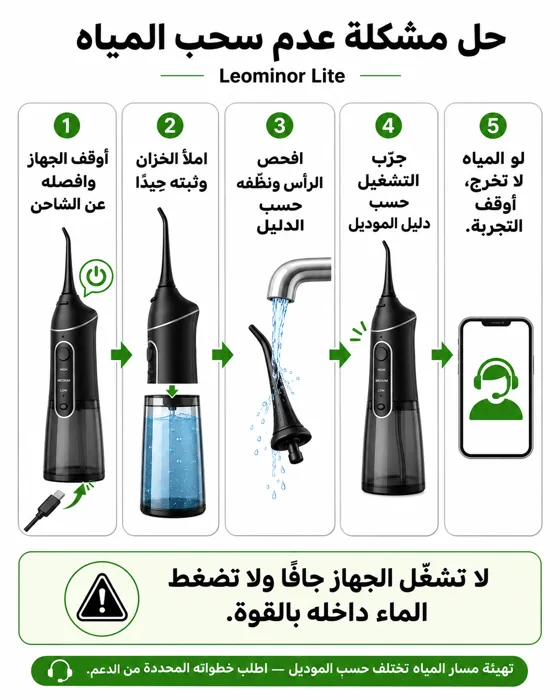
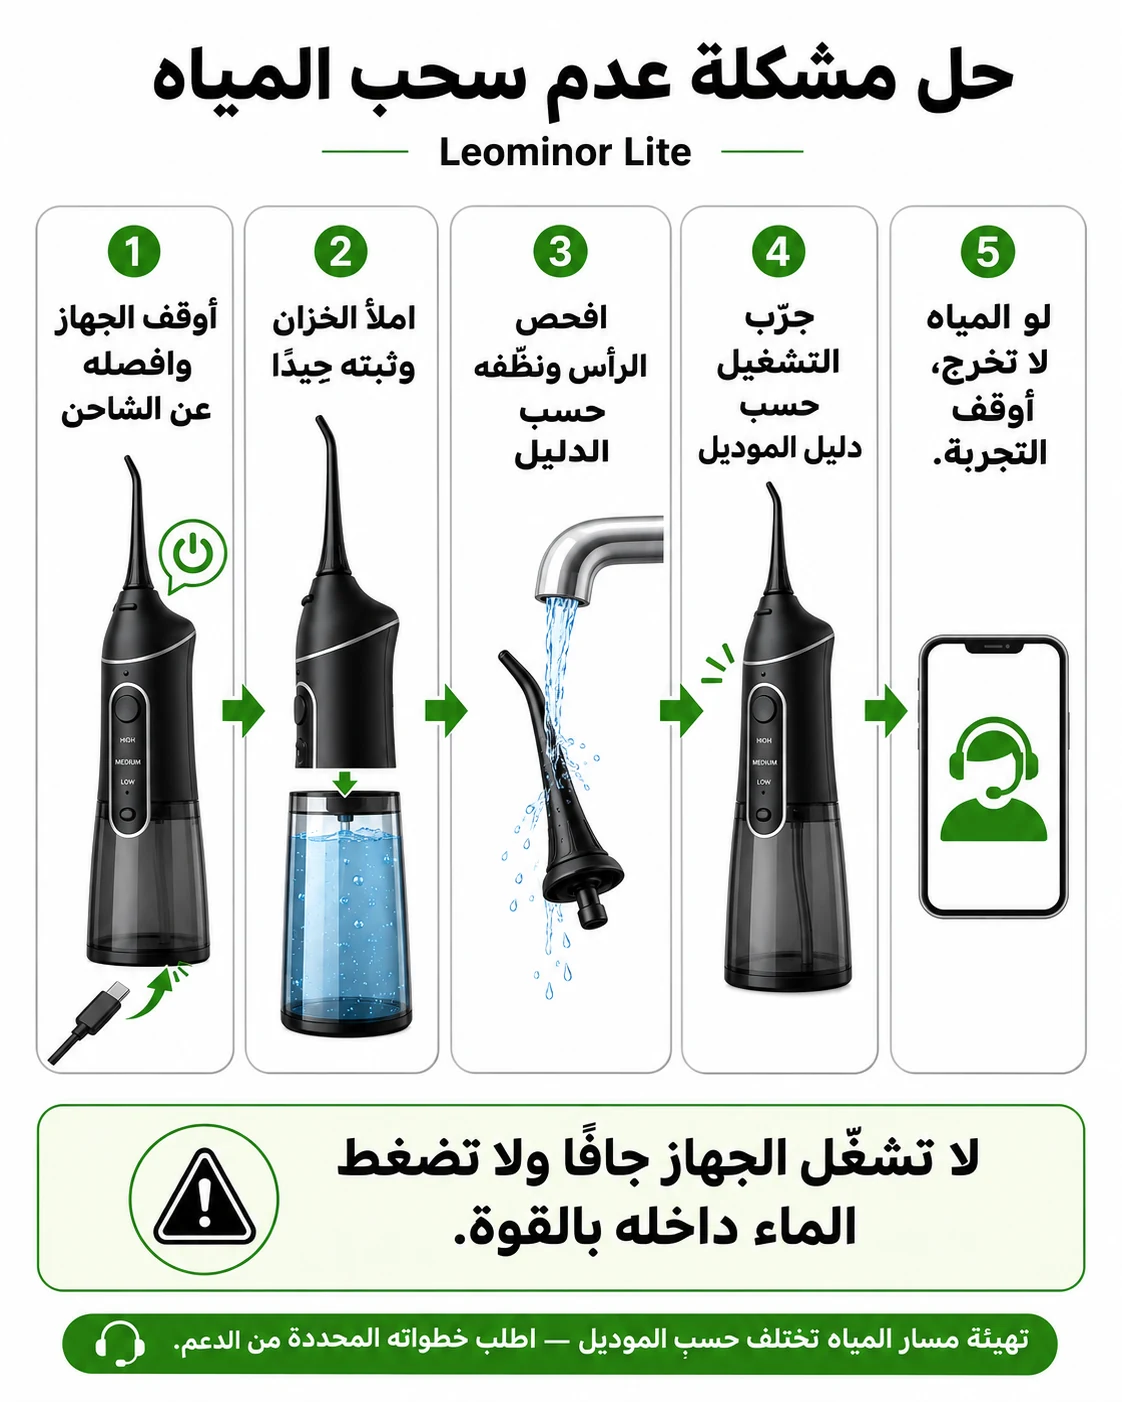
Why can I hear the motor but see no water?

What to do, step by step

  1. An empty or incorrectly fitted tank, a blocked tip or air trapped in the water path (Air Lock) may cause this. Motor noise alone does not confirm the diagnosis.
  2. Switch off and disconnect the charger. Fill the tank with water suitable for your model, then fit the tank and removable tip as instructed in its manual. Check any visible external tube, if fitted, without opening the device.
  3. Try operating it as instructed in the manual. If water still does not flow, stop and ask support for the priming procedure specific to your model.

Avoid repeated dry running. Do not force water in with a syringe or use mouth suction. Priming procedures vary by model.

After the checks

If normal flow returns, monitor during ordinary use. If there is still no flow, stop; do not keep running the pump dry.
Still unresolved? Prepare the device details →
No water flow — Leominor Lite checksView full guide ⤢
No water flow — Leominor Lite checksCorrected edition of the supplied visual guide: external checks without forced water injection or dry running.
02

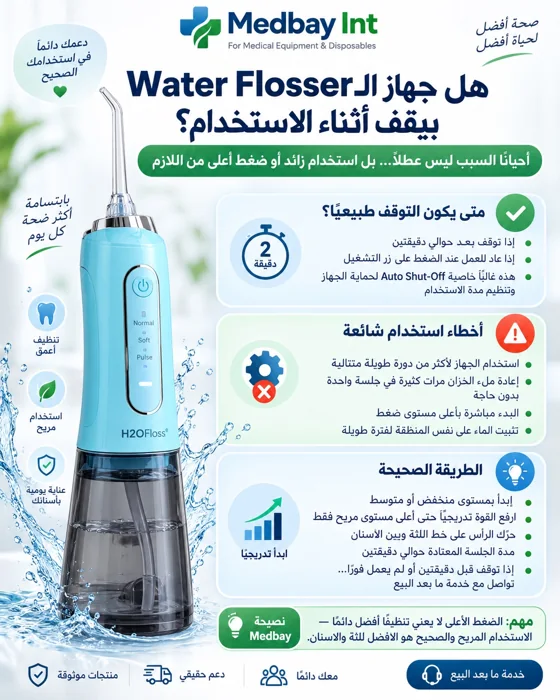
What should I check if water pressure drops?

What to do, step by step

  1. Check the water level, tank fit and battery charge. Select a comfortable pressure setting available on your device.
  2. Inspect and clean the removable tip only as allowed in the manual. If you have a compatible, undamaged spare tip, try it after switching off. Do not insert needles or sharp objects.
  3. If flow remains weak with a full tank and adequate charge, record a short video showing the flow and sound, and send support your model name.

Higher pressure is not always more suitable. Persistent pain or bleeding should be discussed with a dentist rather than increasing pressure.

After the checks

If flow returns after cleaning or changing a compatible tip, continue at a comfortable setting. Do not compensate for persistent poor flow by selecting maximum pressure.

Still unresolved? Prepare the device details →
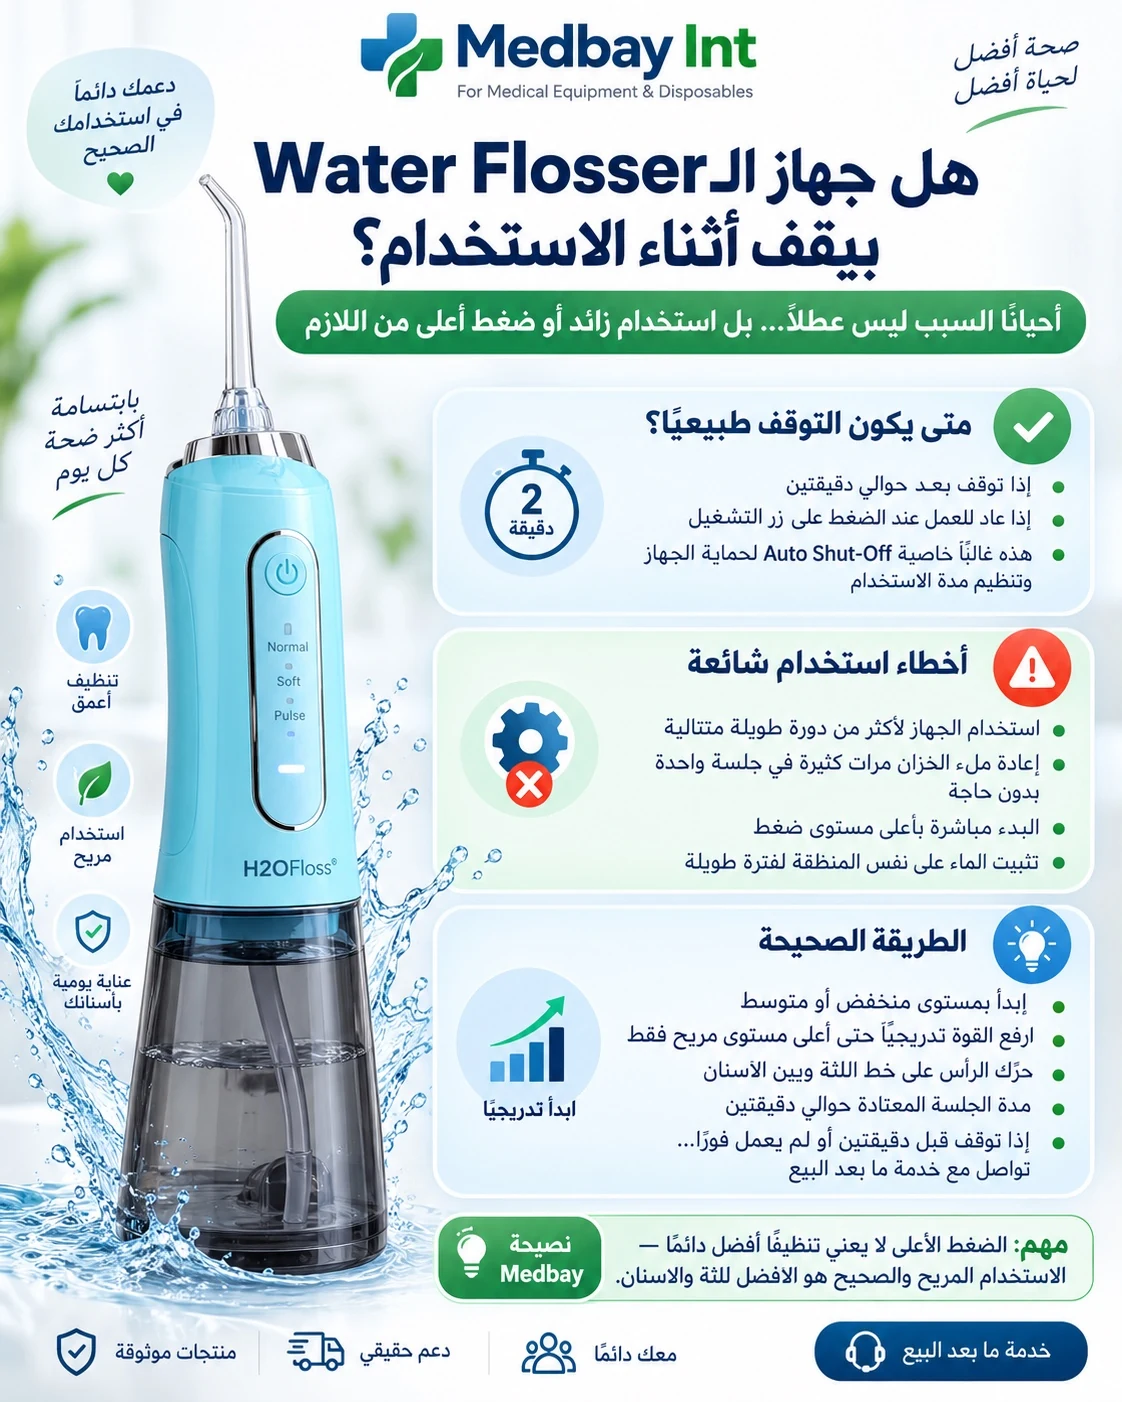
Comfortable pressure and common operating mistakesView full guide ⤢
Comfortable pressure and common operating mistakesThe artwork shows an H2OFloss device. Check your own model manual for pressure settings and operating time.
03

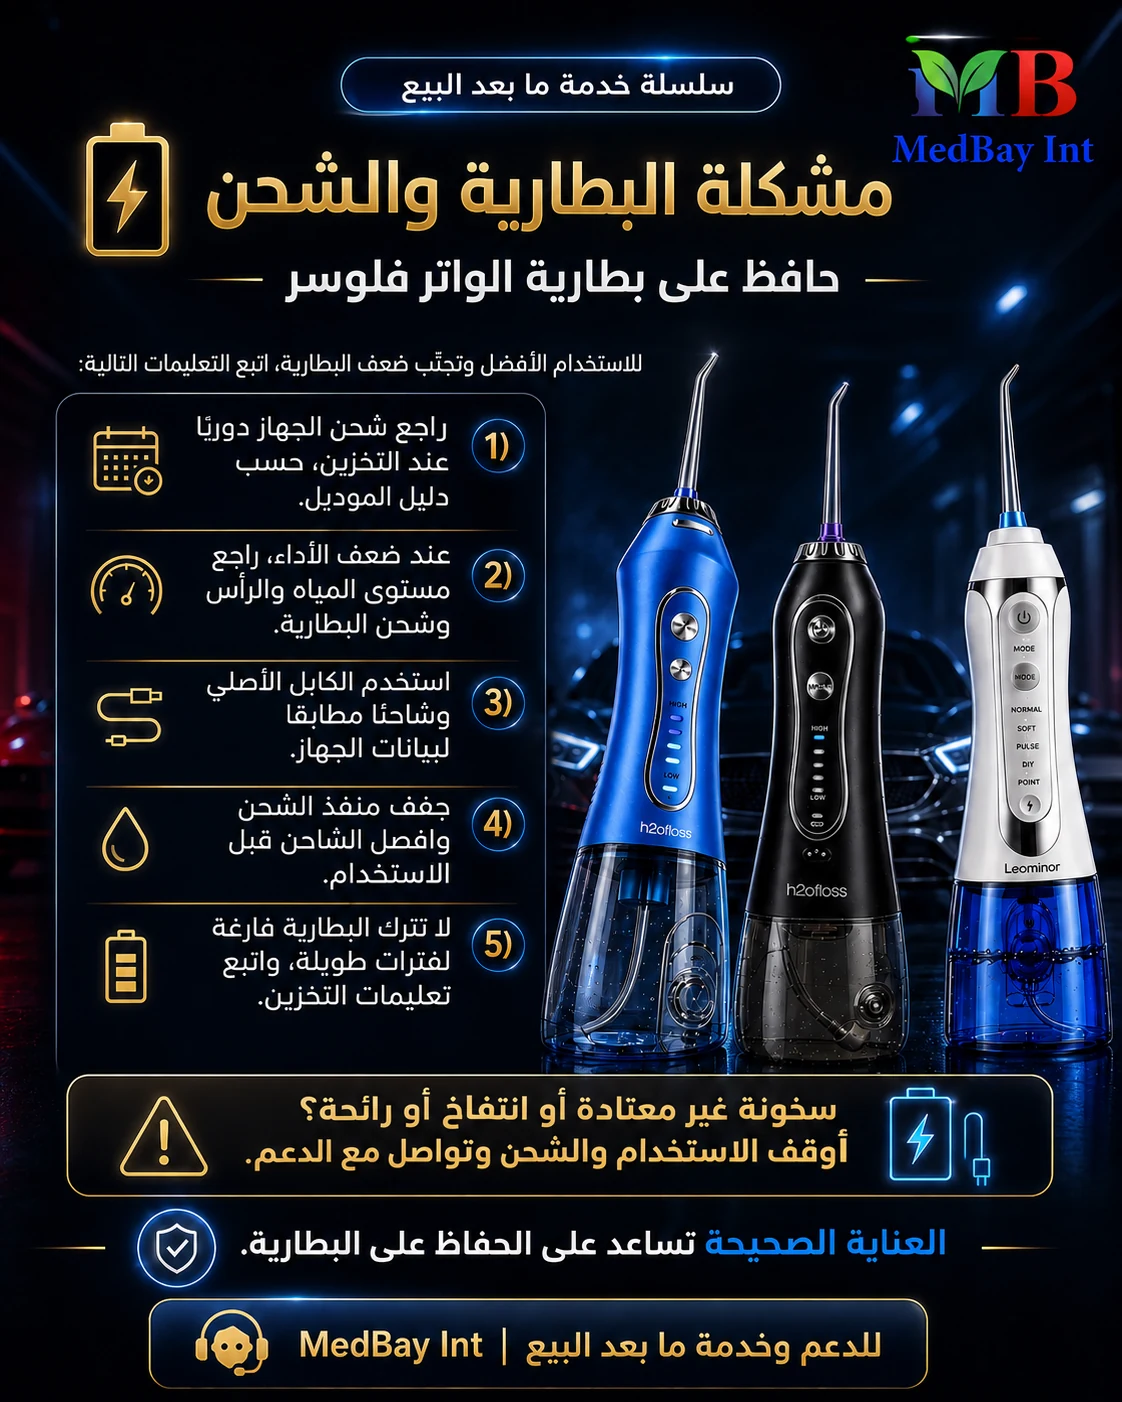
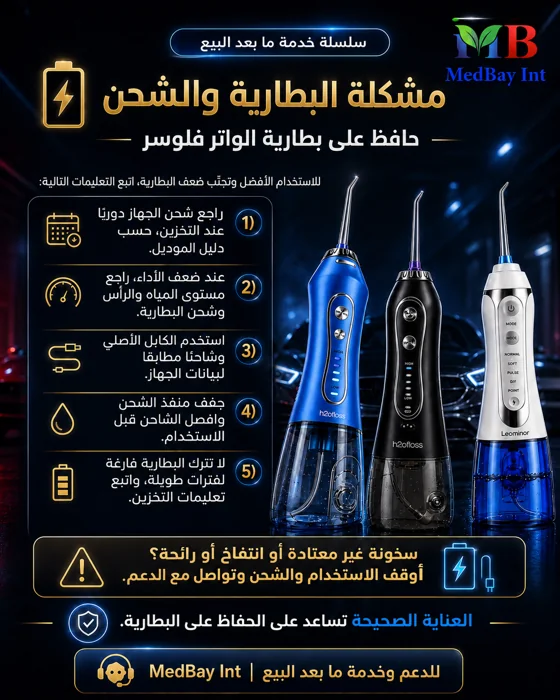
What should I check before requesting a battery inspection?

What to do, step by step

  1. Disconnect the charger and check that the cable is undamaged and the charging port is dry. Use the original or approved cable and a suitable power source.
  2. Match the charger voltage and current to your device label or manual. A 5V/1A supply is appropriate only when that is specified for the particular model.
  3. Charge for the period stated in the manual, then disconnect before testing. If there is no response, send support a photo of the model label and charger specifications.

Stop using and charging a device with swelling, unusual heat, a burning smell or cable damage. Disconnect power safely and contact support.

After the checks

Test after disconnecting the charger. If it responds, monitor the next charge; otherwise prepare photos of the cable, charger specifications and model.

Still unresolved? Prepare the device details →
Battery, charging and storage guideView full guide ⤢
Battery, charging and storage guideUpdated edition of the charging artwork. Charger requirements and charging schedule depend on the model manual.

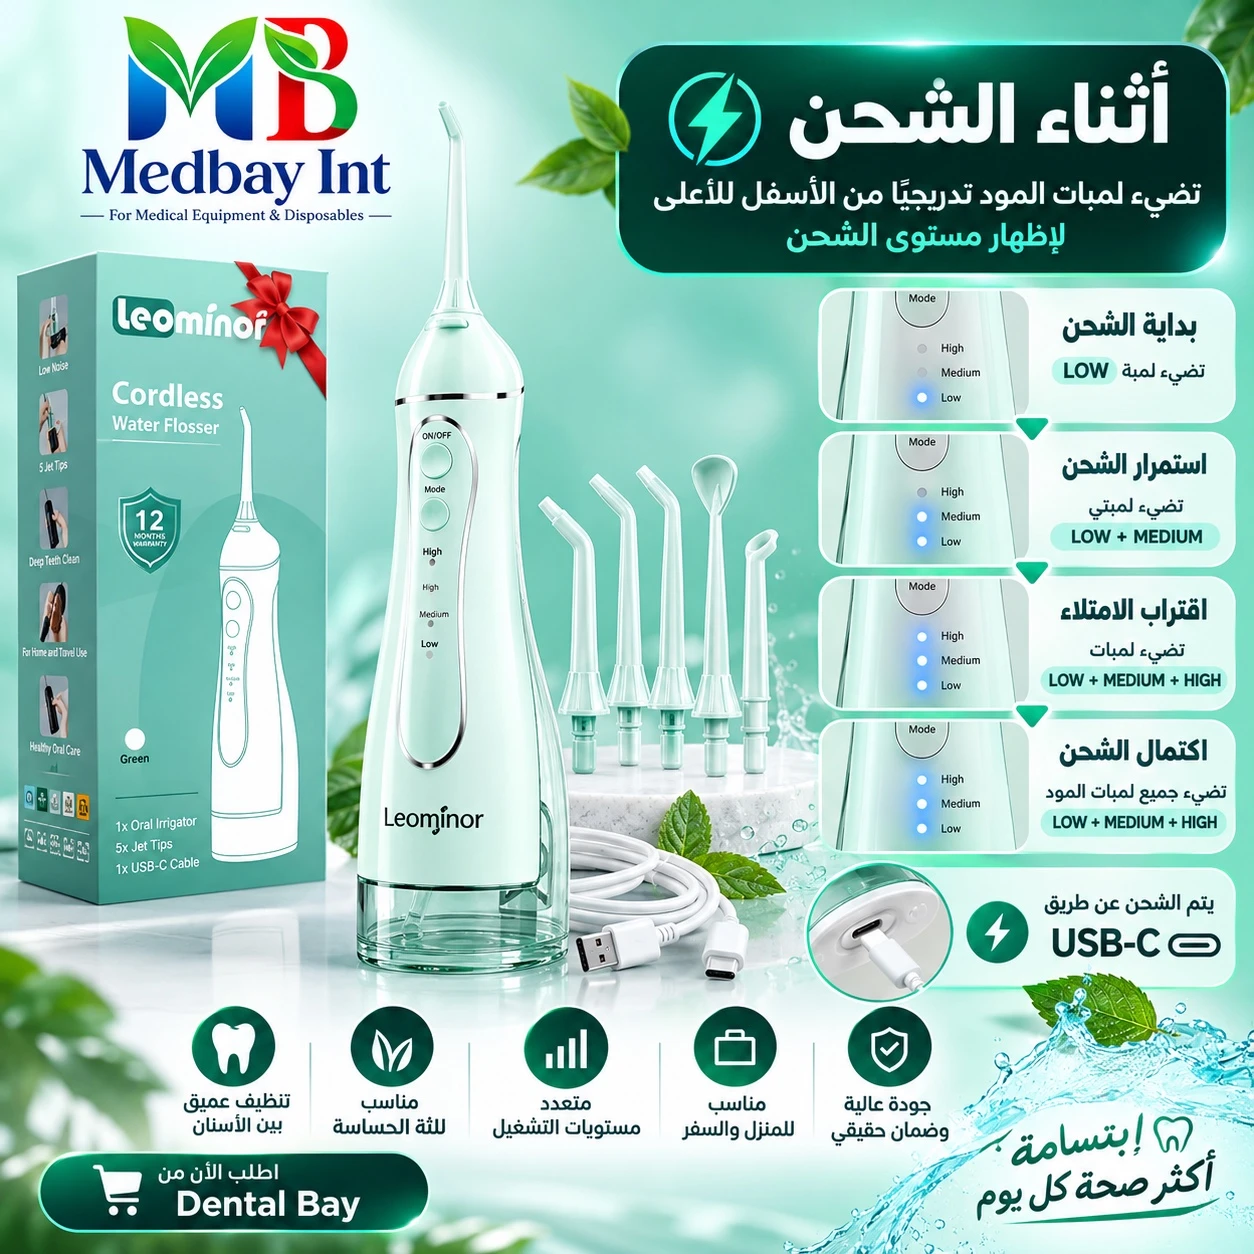
Recognise your model’s indicators

This Green Mint visual is a model reference. Indicator colours and meanings can differ; use your own model’s manual.

Green Mint — charging indicatorsView full guide ⤢
Green Mint — charging indicatorsModel reference image.
04

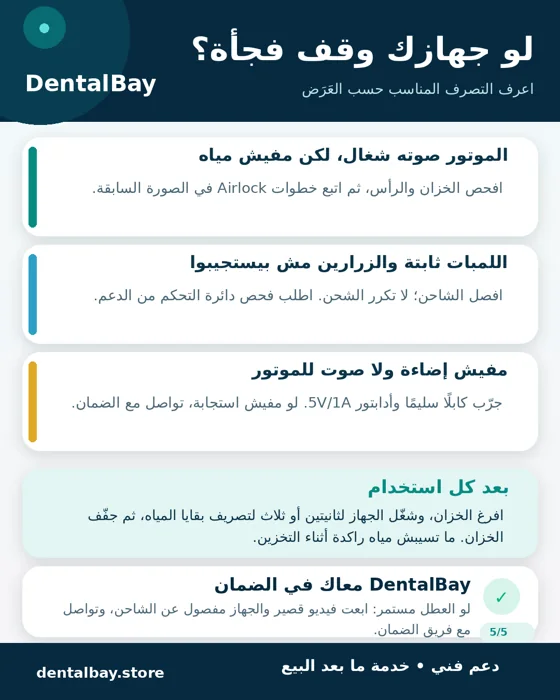
What if indicators are on but the controls do not work?

What to do, step by step

  1. Disconnect the device from its charger. Use a travel-lock or reset procedure only if it is described in your model’s manual.
  2. Do not repeatedly reconnect the charger, try random button combinations or open the device.
  3. Record the indicators and one attempt to switch on while disconnected from the charger. Ask support to assess the controls or battery.

Indicator lights alone cannot identify a failed component; a final diagnosis requires assessment.

After the checks

If the documented travel-lock or reset procedure resolves the issue, resume normal use. Unresponsive controls still need assessment.

Still unresolved? Prepare the device details →
Buttons, indicator lights and symptom checksView full guide ⤢
Buttons, indicator lights and symptom checksIdentify the symptom first. Use the 5V/1A rating shown only if it matches your device label.
05

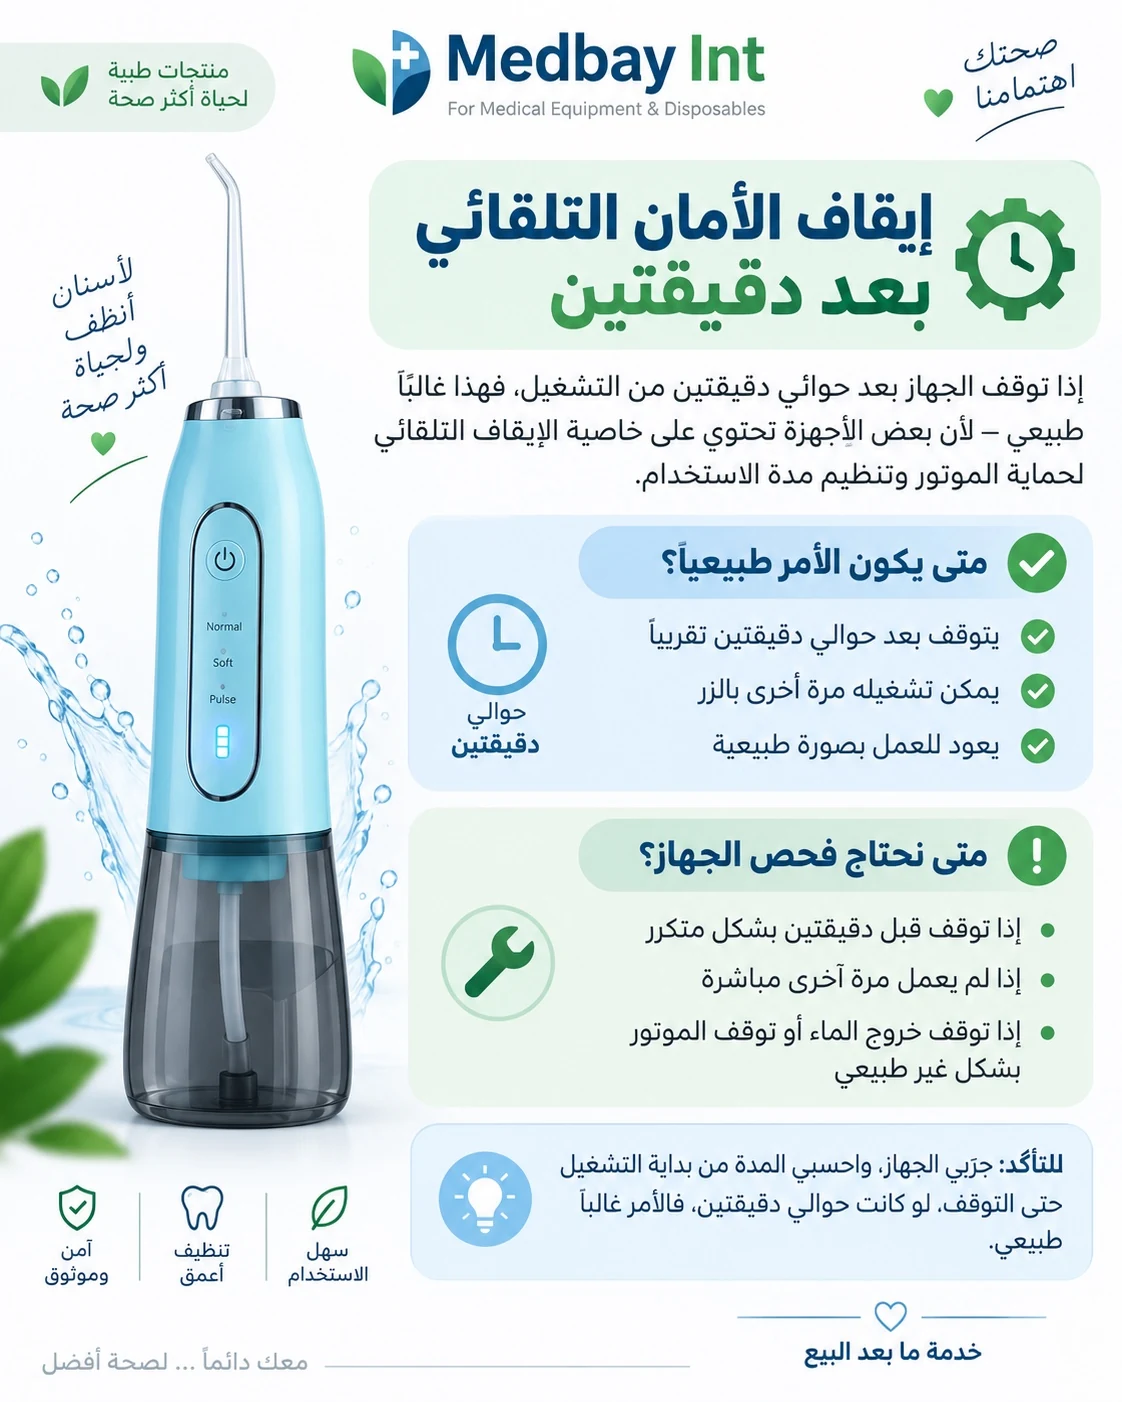
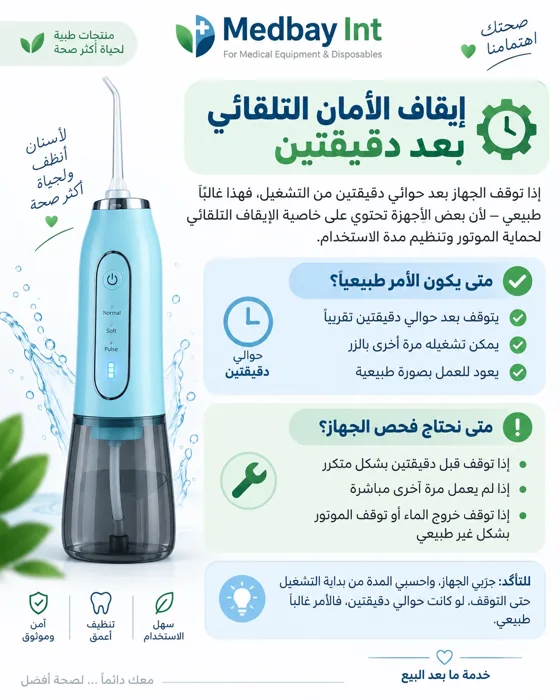
Does stopping after two minutes mean the device is faulty?

What to do, step by step

  1. Some models have an automatic timer, sometimes around two minutes. Treat a stop as normal only when it matches your model’s manual and normal operation resumes.
  2. If it stops earlier than usual, repeatedly stops or will not restart, check water and charge levels, then contact support.
  3. Use a comfortable pressure and move the tip as directed in the manual. Do not repeat long operating cycles to force the device to work.

Unusual heat or a smell is a reason to stop using the device, not a symptom to dismiss as a timer.

After the checks

A regular stop matching the manual with normal restarting differs from repeated unexpected stopping or unusual heat.

Still unresolved? Prepare the device details →
Automatic stopping and when inspection is neededView full guide ⤢
Automatic stopping and when inspection is neededTwo minutes is an approximate timer on some models, not a specification for every device.
06

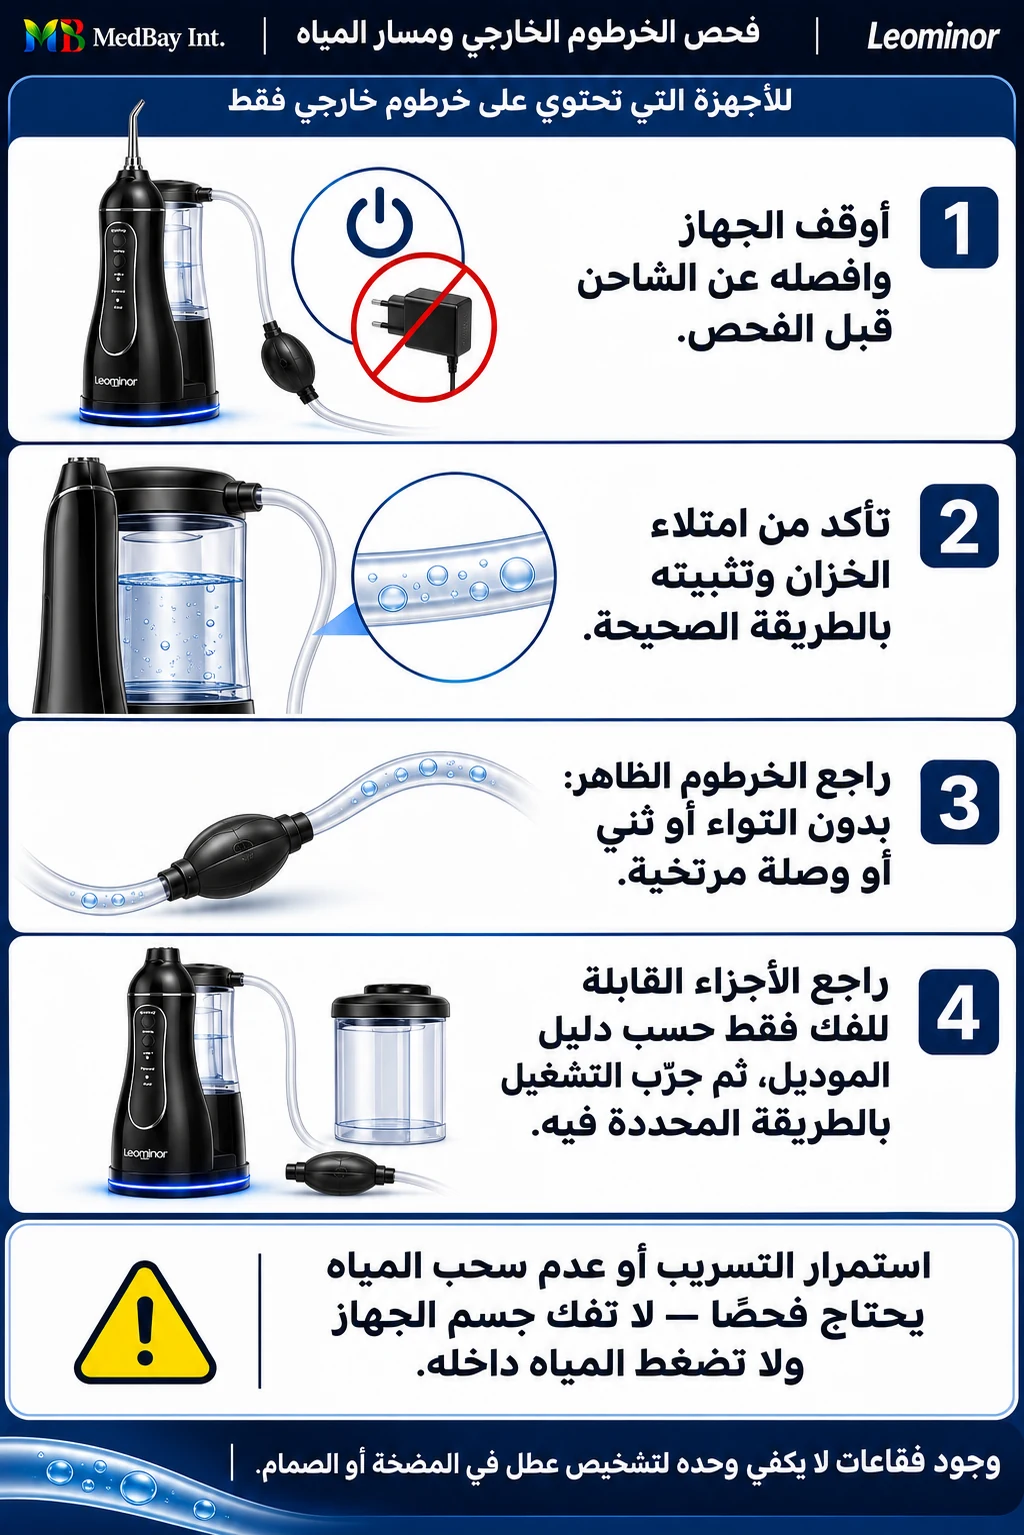
What should I do about leaks or air in the tube?

What to do, step by step

  1. Switch off and disconnect the charger. Check the tank, tip and user-removable parts listed in the manual, looking for visible damage.
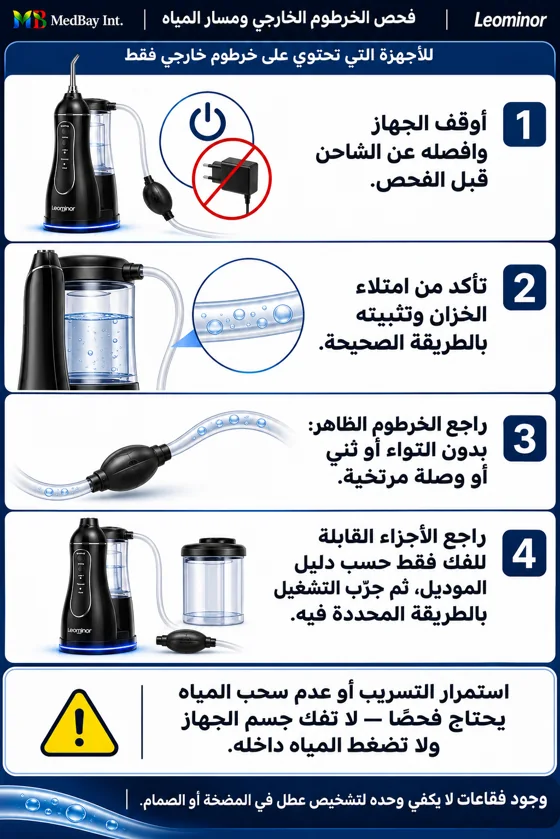
  2. For a model with an external tube, check only for visible kinks or loose connections. Instructions for external tubes or priming bulbs do not automatically apply to a cordless unit.
  3. Water draining back or bubbles alone do not prove a failed valve or pump. Photograph the leak location and model label, then request an assessment.

Do not open the housing, immerse electrical parts or force water into them. Stop using and charging if a leak is near the charging port.

After the checks

If refitting user-removable parts stops the leak, monitor them during use. Stop if leakage continues or reaches the charging area.

Still unresolved? Prepare the device details →
Checking external tubing and connectionsView full guide ⤢
Checking external tubing and connectionsFor devices with external tubing only; corrected to show external inspection only.

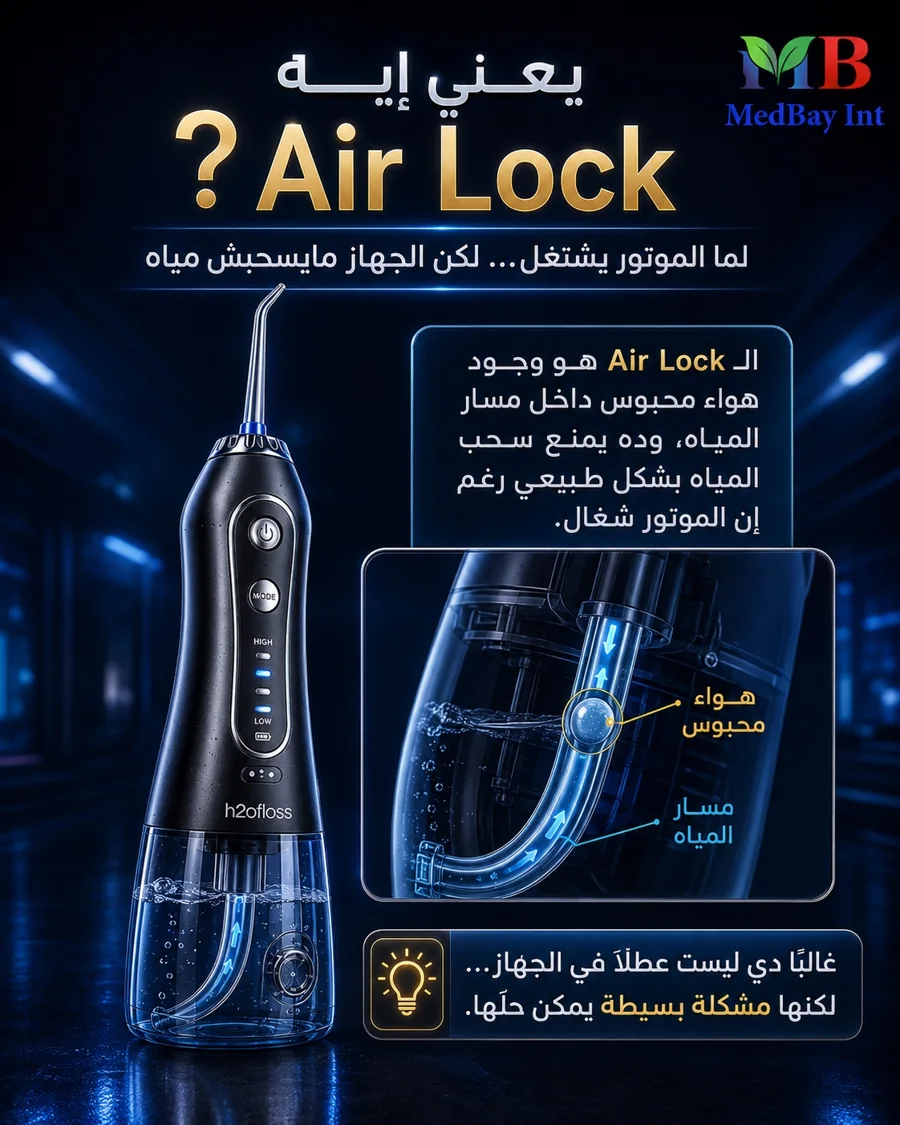
AIR LOCK

Air Lock: a possibility, not a ready-made diagnosis

Air trapped in the water path can prevent water reaching the pump or cause intermittent flow. It may occur after storage or an empty tank, but it is not the only possible cause of no flow.

Start with the tank, tip and correct assembly. Support can then identify the priming method for your model. Images showing external tubes or priming bulbs refer to different device designs.

Prepare a support request ↗
Illustration of an air bubble trapped in the water path of a water flosser
Illustration of trapped air; the device shown may differ from your model.

KEEP YOUR DEVICE READY

A little care after every use

01

Empty and clean

Empty, rinse and clean the tank as directed in the manual, then allow it to dry before storage. Do not leave stagnant water inside.

02

Keep tips clean

Clean removable tips as instructed. Each person should use their own tip. Replace tips according to the manual or when damaged.

03

Store and charge properly

Store dry, away from heat. Check the charge periodically as directed by the battery instructions, especially during extended storage.

Quick checks and after-use careView full guide ⤢
Quick checks and after-use careFollow the care notes alongside the original poster.

Before you put it away

  1. Switch off and disconnect the charger.
  2. Empty and rinse the tank as directed in the manual.
  3. Clean the removable tip; let the parts dry.
  4. Keep the charging port dry and store away from heat.
  5. Check the model’s battery storage instructions before a long break.
Use and cleaning guide

LOCAL SUPPORT FROM MEDBAY

A 3-year warranty.
Clear steps before inspection.

The MedBay warranty covers manufacturing defects in the motor and battery for three years, subject to the warranty certificate and proof of purchase. The team assesses the case and confirms coverage and the appropriate next step.

The team confirms whether the case is covered, whether repair or replacement is appropriate, and any potential cost before work begins. Battery issues are assessed individually under the certificate terms.

Before ordering an accessory, send the model name and a photo of the part. Support confirms compatibility and availability; a similar appearance is not enough.

MEDBAY AFTER-SALES

Warranty, service and accessories — in pictures

Read the warranty certificate for coverage and conditions. Confirm accessory compatibility and availability before ordering. Service arrangements and any cost are confirmed for the individual case.

MedBay after-sales service overviewView full guide ⤢
MedBay after-sales service overviewOriginal service artwork. Warranty coverage follows the certificate; contact the team to confirm the services and parts available for your model.
MedBay warranty certificateView full guide ⤢
MedBay warranty certificateRead the certificate and retain your proof of purchase.

From your first message to the next step

01

Share the details

Model name, order number if available and a clear description of the issue.

02

Initial assessment

The team reviews photos and video and identifies the appropriate checks for your device.

03

Arrange service

If inspection or repair is needed, confirm coverage, delivery arrangements and any charges before work begins.

CUSTOMER EXPERIENCES

Support is part of the experience

Read customer messages about use, arrival and warranty, with the context of each experience.

Read customer messages

MAKE THE FIRST MESSAGE USEFUL

Prepare an after-sales support request

Enter the details, review your message and open it in WhatsApp. This page prepares text only; nothing is sent until you send it yourself in WhatsApp.

Have these ready

  • A photo of the model name and device label.
  • A short video of the issue with the charger disconnected.
  • Proof of purchase and warranty certificate when requested.
  • For charging issues: photos of the charger label and cable.

If there is unusual heat or visible damage, do not operate the device for a video. Send still photos and a description instead.

Or open support WhatsApp directly ↗

+20 100 085 5255

Leominor Egypt support: frequently asked questions

Does every no-flow problem mean Air Lock?

No. The tank, tip, battery charge, a blocked water path or an internal fault can cause similar symptoms. Start with basic external checks and request support if the problem continues.

Can I use a syringe priming method on any Leominor device?

No. Priming depends on the model design and manufacturer instructions. Do not apply external pressure or use mouth suction. Ask support for guidance specific to your device.

Does the 3-year warranty include the motor and battery?

The MedBay warranty covers manufacturing defects in the motor and battery for three years, subject to the warranty certificate and proof of purchase. Coverage, repair or replacement are determined after assessment.

How do I order a compatible replacement tip or spare part?

Send support your model name and a photo of the part before ordering. The team confirms compatibility and availability, then directs you to the appropriate DentalBay product.

Does this form automatically book a repair?

No. It prepares a message only. Open WhatsApp, review and send the message to support, then agree on the next steps with the team.

Content reviewed: 17 November 2026

Open original size